Monday, June 3, 2019

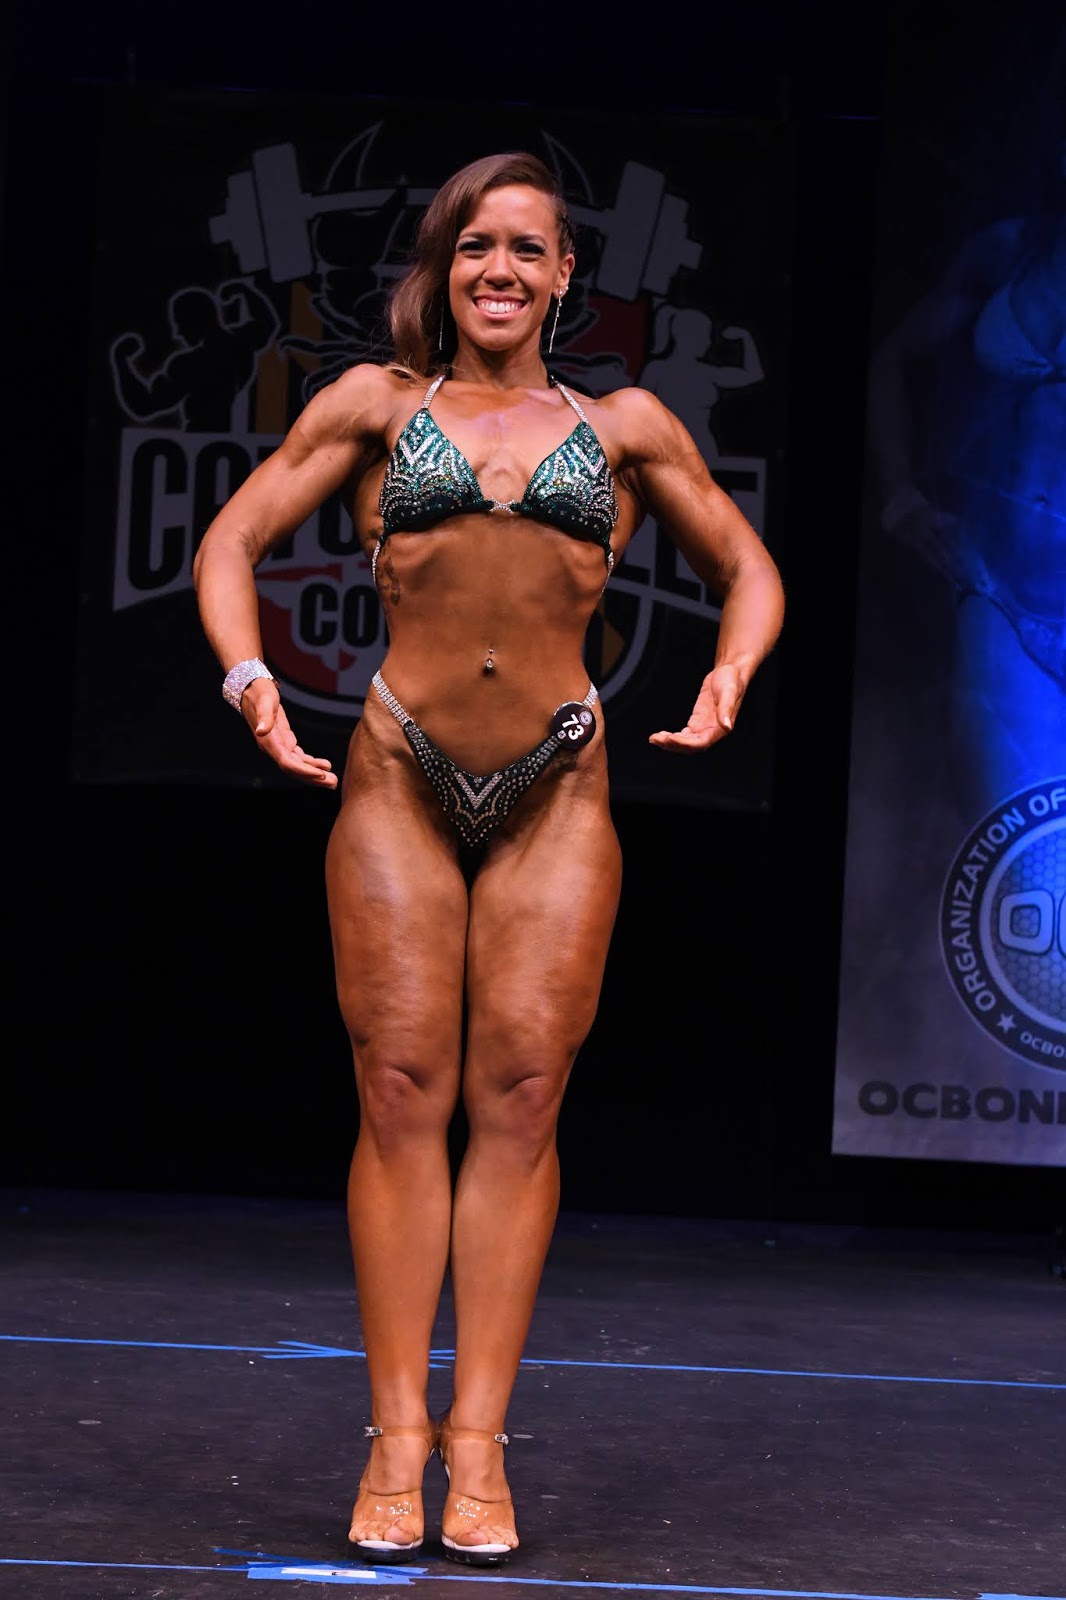
Figure Competition 2019 Season Complete


2019 will be an epic competition year to remember!

Man, you guys what a crazy whirlwind the month of May was. As you saw in my last post from the end of April I was getting ready for my 2 back to back figure competitions. So to make sure I keep everything straight I am going to talk about each show individually! Here we go!

Show 1: May 4- OCB Richmond Atlantic Supershow in Richmond, VA

This show was set up a little differently than my show last August, but then again that is the only show I have to compare it to. There were SO many competitors they divided the day into men and women. Men went in the morning and the women's portion started at 3 pm. Since my show did not start until the afternoon I didn't have anywhere I had to be at the crack of down, but I still had to get up at 6 am to start eating for the day. On show day I have my meals pre-planned as well and I have to eat them at certain times, hence the 6 am wake up call. On a side note, my breakfast was a few tablespoons full of dry instant oatmeal. No milk, No water. Straight up oats. It wasn't as bad as I thought. Once my saliva made the oats wet they tasted pretty good! haha

It was weird though because my fiance and I just relaxed in the hotel room all morning because my hair appointment wasn't until 12 pm. I didn't feel that excited in the morning and I started to question myself like "why am I not more excited?" But when it came time to leave I got really excited!! I was so ready! Hair and makeup went SO incredibly smooth. I loved my look! I went for a soft but edgy look. Backstage I had one of my friends Anna with me so that was fun to have a familiar face to hangout with. Backstage I didn't feel nervous, but as soon as I went out on stage to compete in the Novice Category and hit my first pose my body started shaking to the point I felt like I was trembling and I freaked the judges could see it! (I was told later they could not!) When I went back out a few divisions later for Open A Category my body didn't shake.

The competition was tough this year! The judges had us up on stage probably for a good 5-10 minutes, which feels like FOREVER when you're holding those poses. It was well worth the fight! Overall, I placed 2nd in Novice and 2nd in Open A. I was BEYOND PROUD of myself and all that I conquered. I knew I could walk away knowing that I gave it my all!

My feedback from the judges was I need to tone/slim down my quads more and build more shoulder. It was very similar to the feedback I received for my August 2019 show, but I definitely made progress in those 9 months. Albert and I went out afterwards and had some of the best cheeseburgers ever!!!! I am still drooling over them.


Show 2: May 11- OCB Catonsville Conquer in Catonsville, MD

I went through a second peak week as my shows were back to back. My coach and I took the feedback I got from the May 4 show and put it into training hard for this show. We added 45 minutes of fasted cardio back into every morning and weightlifting at night. I knew I could do it because it was only 5 days. I knew there was an end in sight and I was determined to give it my all. For the May 4 show we took the cardio out during peak week and as you'll see later it definitely made a difference!

This show was amazing and so much fun! We started at 10 am so that meant I had to wake up early, but I also started getting ready earlier. The show had men and women, but all the men's divisions went first and then the women did. So in the morning it was a little hard to stand around and wait, but I made friends and we all kept each other busy. One of the things I love about competing, at least with OCB, is most of the girls I've met backstage are super nice and we become friends. We are competing against each other, but we support each other too.

Can I side track for a minute? I LOVED my tan! It looked so natural and on stage it made my suit pop! ah! I competed in Open A and Novice categories again this show....working for that first place! The competition was also tough this show too. I walked into it thinking I would place 2nd again or hopefully first since I did so good in my show the weekend before. I took 3rd place in both categories! I am not going to lie and say I was thrilled with 3rd place. Again, I took 2nd place the week before and for this show I came in leaner and tighter, essentially I brought a better package, so I was a little disappointed in myself. But it just goes to show you it depends who shows up that day to compete.

Albert was at both shows cheering me on! I loved having him there. He is my rock and supporter! <3 After the show we went and stuffed our faces at this AMAZING restaurant called Jimmy's Famous Seafood in Baltimore, MD. I can't wait for us to go back there again!

Well that was it! That's a wrap on my 2019 season. It was amazing and I couldn't have asked for a better coach to help guide me! She truly became one of my friends! I will be taking a long off-season as now I can focus my time and energy on becoming Mrs. Smolinski. I know what I need to work on...build more shoulder and slim down my legs. So season 2021 I am coming for you with a vengeance. I hope you're ready!

All in all I gave it my best and I couldn't be more proud of myself!


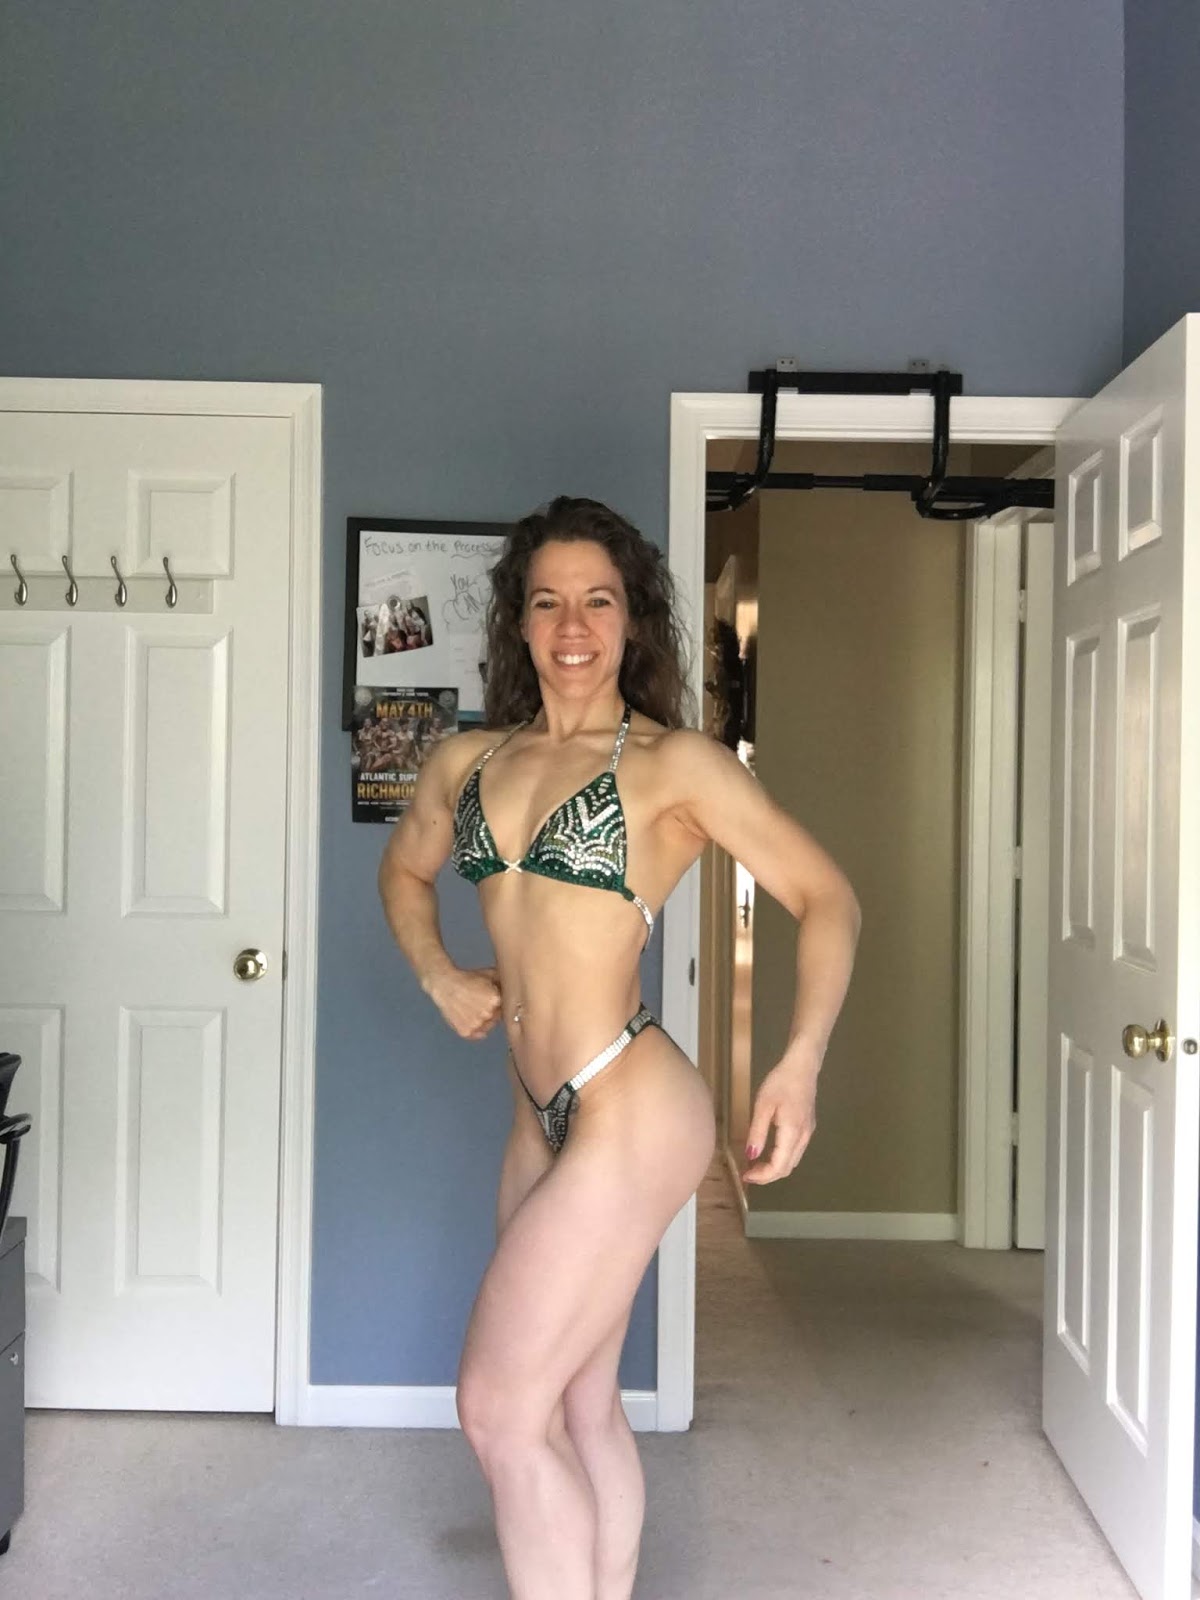
Here is a transformation between show 1 and show 2:


Thank you so much for sharing in my journey with me! Stay tuned for my next post as we will discuss reverse dieting!


SHARE:

Saturday, June 1, 2019

Strawberry-Rhubarb Crumble Muffins

With summer right around the corner it is never too early to start planning those summer treats!

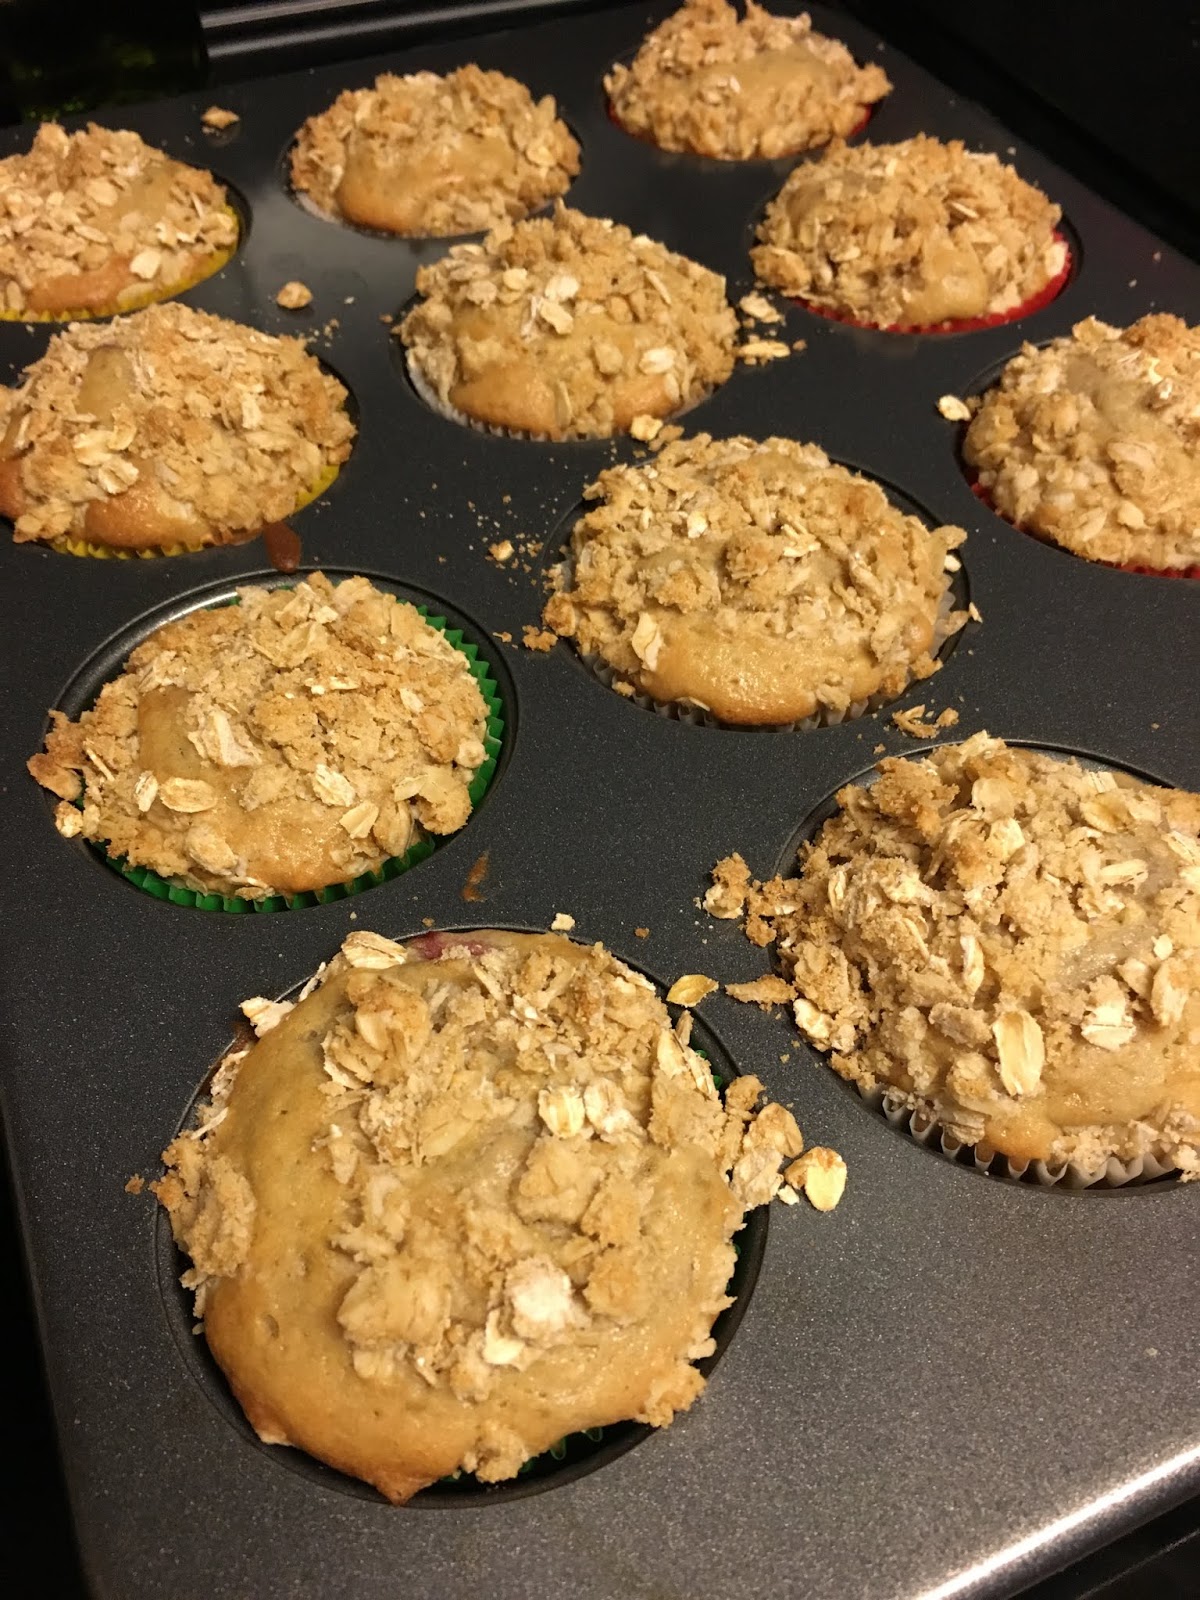
I love these muffins because they're light, fluffy, and scream fresh fruit. So I made a trip to my local farmers market and picked up a few containers of fresh strawberries. They were sweet and perfectly in season.

Even though this is the muffin recipe for May you could definitely make these all summer long! Pair with a bowl of yogurt, fresh fruit, or maybe a little ice cream on the side.

There are a few working parts to this recipe so make sure you read the recipe before you get started. I am always so excited to start baking that I usually half-read the directions and then I have a few oopsy moments!

I hope you're having as much fun with these muffins as I am!

Let's Get Baking!

Active Time: 30 minutes
Total Time: 2 hours
Makes: 12 muffins

For the Topping:

  • 3/4 cup rolled oats
  • 1/2 cup packed light brown sugar
  • 1/2 cup all-purpose flour
  • 1/2 teaspoon salt
  • 5 tablespoons cold, unsalted butter, cut into pieces

For the Muffins:
  • 1 cup 1/2-inch pieces rhubarb (1 stalk)
  • 2/3 cup chopped strawberries
  • 3/4 cup plus 1 tablespoon granulated sugar
  • 2 cups all-purpose flour
  • 3/4 teaspoon baking powder
  • 1/2 teaspoon baking soda
  • 1/2 teaspoon salt
  • 2 large eggs
  • 2/3 cup milk
  • 6 tablespoons unsalted butter, melted and cooled slightly
  • 1 tablespoon fresh lemon juice
  • confectioner's sugar, for dusting
Directions:
  1. Preheat oven to 350 degrees. Line a 12-cup muffin pan with paper liners. Make the topping: Mix the oats, brown sugar, flour, and salt in a small bowl.  Add the butter and work it in with your fingers until the mixture comes together in clumps (approx 5-10 minutes). Set the toppings aside.
  2. Make the muffins: Toss the rhubarb and strawberries in a small bowl with 1 tablespoon granulated sugar, set aside. Whisk the flour, remaining 3/4 cup sugar, baking powder, baking soda, and salt in a large bowl, make a well in the center. Add the eggs to the well and gently whisk. Stir in the milk, melted butter, and lemon juice until just combined with only small bits of flour remaining. Stir in the rhubarb-strawberry mixture.
  3. Divide batter among the muffin tins, filling them almost to the top. Top each muffin with the crumble mixture. Bake until the muffins are lightly browned, about 25 minutes. Insert a toothpick into the middle of the muffin, the toothpick should come out clean and then you know they're done!
  4. Once the muffins are done, pull them out of the oven and let them cool in the pan for 5 minutes. Then transfer them to a rack to cool completely. Dust with confectioners sugar once cooled.
Enjoy! Stay tuned for next month's muffin of the month!


SHARE:

Thursday, May 16, 2019

Carrot Cake Nest Cookies

Food Network's April cookie of the month is perfect for this time of the year! The cookies jelly beans remind me of Easter Eggs and the carrot cake flavor of the cookie is a bold spring flavor this year. Carrot cake is definitely a Spring flavor and when made right can provide the right amount of sweetness without being over the top sweet.

I made these cookies for a girls night at my friends house. It was a potluck so I thought what a good excuse to bake a fun treat and show my creative side, so that's exactly what I did!

This recipe is pretty easy to make. I baked the cookies earlier in the day and then before I headed out to my friends I whipped (literally!) the cookie filling up real quick, placed the jelly beans on top, and out the door I went. The girls loved them! I had a few left over so I took them to work the next day as a treat for my co-workers. Well I am sure you're dying to know how to make these, so let's get to it!

Cookie Ingredients:
  • 1 1/3 cup all-purpose flour
  • 1 1/2 teaspoon ground cinnamon
  • 1/2 teaspoon ground ginger
  • pinch of ground cloves
  • 1/4 teaspoon salt
  • 1 stick unsalted butter, at room temperature
  • 1/3 cup granulated sugar
  • 1/3 cup packed dark brown sugar
  • 1 large egg yolk, at room temperature
  • 2 teaspoons pure vanilla extract
  • 3/4 cup finely grated carrots (about 2)
  • 1/4 cup finely chopped toasted walnuts
  • 1 1/3 cups shredded sweetened coconut 
For the Filling:
  • 2oz cream cheese, at room temperature
  • 2 tablespoons unsalted butter, at room temperature
  • 1/8 teaspoon pure vanilla extract
  • 1/2 cup confectioners sugar
  • Jelly beans for topping
Directions:
  1. Position the oven racks in the upper and lower thirds of the oven, preheat to 350 degrees. Line 2 baking sheets with parchment paper, set aside. Whisk the flour, cinnamon, ginger, cloves, and salt in a medium bowl. Beat the butter, granulated sugar, and brown sugar in a large bowl with a mixer on medium-high speed until light and fluffy (about 3 minutes). Add the egg yolk and vanilla and beat until well combined, then beat in the carrots and walnuts. Reduce mixer to low and slowly beat in the flour mixture until just combined.
  2. Roll 1 tablespoon of dough into a ball, then roll in the coconut (you may have to press the coconut onto the dough). Repeat until all the dough is gone and rolled in coconut. Arrange cookies 1 inch apart on prepared baking pans. Make a deep indentation with the back side of your tablespoon or another spoon. Bake, switching trays halfway through, until the cookies are set and the coconut is golden brown (about 22 to 25 minutes). Let cookies cool completely on pan.
  3. Make the filling: Beat the cream cheese, butter, and vanilla in a medium bowl until light and fluffy. Mix in the confectioners sugar until fluffy. Refrigerate until ready to use. Dollop a teaspoon of the filling into the deep indentation of each cookie. Fill with 1 teaspoon and if necessary you can go back and add extra filling to fill the indentation. Top with whatever color jelly beans you prefer!
I hope you have fun making this recipe! It's definitely kid friendly as kids could help roll the dough in coconut or top the cookies with whatever jelly beans they want. Choose different color jelly beans depending on what time of year you make them too coordinate with the season or holiday!

Have you made this? I would love to hear how it turned out! Share with me below!

Stay tuned for May's cookie of the month! We're making Macarons!


SHARE:

Sunday, April 21, 2019

Competition Prep 2019: 2 Weeks out from OCB Atlantic Supershow

TWO WEEKS OUT!!

It may not seem like it's that far away, but sometimes the days drag on and by this point I am so ready to compete that I just want to get on with it! But alas, I still have 2 weeks. This year I have been doing monthly updates, but so much happens in the month before the show that I wanted to provide a mid-month update.

In the past couple of weeks I attended a Judges Clinic and an OCB 101 Clinic. The judges clinic is for people who want to eventually be a judge for OCB shows.  I learned the ethics behind judging, how to address conflicts of interest, and the criteria competitors are judged on. OCB posts the criteria on their website, but it helped me have a deeper understanding of what they look for. While I am not going to be a judge right now, attending the clinic helped me to learn as a competitor how I can be better on stage and training. The more knowledge you have the better!!

The OCB 101 Clinic was an amazing event! It was held at the Grind Gym in Baltimore, Maryland. There was about 20 or so competitors there and we learned how OCB as an organization works, the do's and dont's of show day, and proper posing. I even ran into a few girls I competed with last year which made it like a family reunion! The people I met at my show, the Presidential Cup, last year have become some of my biggest supports and greatest friends. We also had a posing lesson and they gave us these amazing swag bags, which was so sweet! Every time I attend an event I learn something new.

Okay, lets talk diet and workout schedule. BOTH changed. *sigh* Which I knew was coming, but still it's not always easy. I started my cutting diet to help me slim down for show day and I originally had a combination if veggies, almonds, chicken, and brown rice, but then my coach cut out the brown rice (CRYING). My quads still dominate the overall symmetry of my body. My symmetry is a little better than last year because I have built my shoulders, but not enough so no more carbs for me. Symmetry refers to having equal muscle built on the top half of my body as the bottom half. The decisions our coaches make is never to torture us, but to get us looking the best for show day. I trust my coach because I know she knows what she's doing. I am around 1,400 calories and eating chicken, green veggies, protein shakes, and almonds. Did I mention I still have 2 more weeks? haha

At the end of March/beginning of April, I started doing fasted cardio in the morning for 45 minutes. For me that mean no eating in the morning before I workout and then for 45 miuntes I run for 5 minutes and then walk for 5 minutes or any combination of those intervals. Well since I can't eat before my cardio that meant my lifting workouts were moved to the evening since I couldn't do my cardio at night after eating all day. My lifting workouts are a pyramid system so I do each move for 4 sets. I start off with light weight and increase the weight for each set. Also, all the workout moves are build into a super set. A super set is when you perform two exercises back to back with no break in between, then when you're done with the super set you get a break.

This workout schedule has not been easy for me. I am not a runner by nature and my body the second week in April started feeling all my days of doubles in the gym. My body was tired, my right knee was sore, and I had no energy. I still pushed, but it was not easy. I wanted to give up. I even texted my coach complaining like a 5 year old that I did not know how much longer I could keep up the schedule. She apologized and told me she did not like this and if we had more time to train it would not be this way, but we are doing the best we can! I was feeling overwhelmed with work, training, home life, etc. I felt better afterwards....sometimes you just need to get it out and move on! But tonight as I write this I feel like I have a new wave of energy and that I am ready to PUSH.

Last thought for this post. On Saturday, Albert and I set aside the whole day to celebrate our 6 year anniversary. Our anniversary was during the week so we couldn't do anything special (he did bring me flowers home!). We planned to got to this area of DC called The Wharf. It is an up and coming area being rebuilt along the waterfront on the Potomac River. They have a lot of amazing restaurants, activities, and beautiful scenery. I decided it would be easy for us to drive there as I figure there would be a lot of parking garages....wrong. They were all full. So what started off as a 30 minute drive ended up an hour long with traffic and trying to find parking. I was NOT happy. I am now in a mood. The scenery was beautiful and the weather was perfect for walking around. We got coffee from Dolcezza and walked down the boardwalk. Well, then I started getting hungry. All the restaurants were on at least a 45 minute wait and I couldn't eat at any of the small food stands so I told Albert we had to leave because I needed to eat. We left, ended up finding a food court I could eat at only for them to tell us they closed 5 minutes earlier. My mood right now was not pleasant. So we trucked back to find where we parked the car and go home to eat.

By this point Albert is not saying much and I could tell something was wrong. I knew I ruined the day. I apologized and we both agreed the day did not go how we wanted it to. Sometimes it happens- the not so pleasant part of competing. It is not all rainbows and sunshine and getting in really lean shape and having abs--- it comes at a price and my price that day was enjoying the day with Albert because I could not eat anything. We made up and I told him I would make it up to him! <3

So here we are 2 weeks out and 3 weeks out from my show in Catonsville, MD! Check out some progress photos below!


Stay tuned for my next update! It will be after my OCB Richmond show and right before my OCB Catonsville Show! Thank you for all of your love & support!


SHARE:

Friday, April 12, 2019

Rainbow Slice-And-Bake Cookies


March Cookie of the Month:

Rainbows are just for the Irish to show where a pot of gold might be, but I guarantee if you follow your baking skills to the end of this rainbow you will be proud of accomplishing this recipe!

I have never made a layered cookie like this before, and if you have, then kudos to you because it is a challenge. To achieve the layered look of these cookies you make one dough, but then measure sections of dough into different pieces, dye the dough a color of the rainbow, and then layer on top of each other.

The cookie dough makes and looks like a sugar cookie mix, but when the cookies bake they come out of the oven as a light, crispy cookie with a nice crunch. They don't lay heavy in your stomach, which could be a blessing and a curse because then you can enjoy more!

Even though this was the cookie of the month for the March issue of the Food Network Magazine this is a cookie you can make for many occasions, such as birthday parties, summer BBQs, or just to spread some sunshine around your office.

As a side note, you will need a food scale to portion out the different sizes of cookie dough.

Now, let's get baking!

Active: 1 hour / Total: 3 hours / Makes: about 36 cookies

Ingredients: 

  • 2.5 cups all-purpose flour, plus more for dusting
  • 1/2 teaspoon baking powder
  • 1/4 teaspoon salt
  • 2 sticks unsalted butter, at room temperature
  • 3/4 cup granulated sugar
  • 3/4 cup confectioner's sugar
  • 2 large egg yolks
  • 2 teaspoons pure vanilla extract
  • 1/4 teaspoon of each red, orange, yellow, blue, green, and purple gel food coloring
  • 1 cup white candy melts (I found them at Michael's!)
Instructions:
  1. Whisk the flour, baking powder, and salt in a medium bowl. Beat the butter, granulated sugar and confectioner's sugar in a large bowl with a mixer on medium-high speed until light and fluffy, about 2 minutes. Beat in the egg yolks and vanilla until smooth. Reduce the mixer speed to medium-low and gradually beat in the flour mixture until the dough just comes together.
  2. Divide the dough into 6 pieces: 
    • 2 large pieces (approx. 7oz each), tint 1 Red and the other Orange*
    • 2 medium pieces (approx. 5oz each), tint 1 yellow and the other green
    • 2 small pieces (approx. 3 oz each), tint 1 blue and the other purple
    • While you mix the color with the dough use gloves if mixing by hand or a spatula in a bowl
  3. On a floured sheet of parchment paper, roll the purple dough into a 7-inch log (about 3/4 inch thick) and set aside. Using a rolling pin, roll out the remaining dough into rectangles on separate floured sheets of parchment paper, dusting with more flour as needed.**
    • Blue: 3.5 in by 7 in
    • Green: 5 in by 7.5 in
    • Yellow: 6 in by 8 in
    • Orange: 7 in by 8.5 in
    • Red: 8 in by 9 in
  4. Tightly wrap the blue dough around the purple loge, keeping the dough in a log shape. Pinch the seam where the 2 dough's come together to close. Continue wrapping the logs with the dough: green, then yellow, then orange, and finally red. Wrap the whole log in plastic wrap and freeze until firm, about 1 hour.
  5. Preheat oven to 375 degrees. Trim the ends of the log to have nice even ends then slice into 3/8 inch-thick rounds (I used a ruler). Arrange cookies about 1 inch apart on 2 unlined baking sheets and refrigerate for at least 15 minutes. 
  6. Bake one pan at a time until the cookies are just set around the edges and golden on the bottom, about 10-15 minutes. Let cool on the pan for 5 minutes before transferring to cookie racks to cool.
  7. While cookies are cooling, put the candy melts in a microwave-safe bowl and microwave in 30 second intervals, stirring, until smooth, total approx. 2 minutes depending on the power of your microwave. Allow to cool for 1-3 minutes. Transfer into a resealable plastic bag, filling from the corner of the plastic bag up. Snip a small section of the corner (be careful, if you snip off too much the melted candy will come pouring out) and pipe small clouds on the ends of each rainbow. I did 3-4 clouds on each side of the cookie depending on how big the cookie was. Let clouds set at least 5 minutes.
  8. Store in a sealed Tupperware container for up to a week. 
*I used A LOT of food coloring to make sure they were a bright, vibrant color. You can't over do it.
**I felt the dimensions o the rectangles were too large. I had a lot of extra dough left on the sides of the cookies so I would suggest making the rectangle dimensions a little smaller than what is suggested. It may have been me, but this is one of those recipes that I may need to make again to figure out what the best way is.

May the luck of the Irish always be on your side and who knows, maybe you fill find a pot O'gold at the end of your rainbows! 


I hope you enjoy baking and eating these cookies! Stay tuned for April's Cookie of the Month!


SHARE:

Tuesday, April 9, 2019

Competition Prep 2019: Month 3

Well, March came and went as quickly as I go through a jar of peanut butter (aka very fast).

I am sitting here trying to remember everything that happened in the month of March it all seems like a blur to me. I feel like a lot happened, but also nothing super significant. Oh! I know! I got to have weekly refeed meals!!!!! But I will get to that in a minute.

At the beginning of March I was 8-ish weeks out from my May 4 show. I started off the month with a new meal plan and a new workout program. My meal plan did not change too much in terms of portions, but I was still carb cycling with 4 days high carbs and low fats and 3 days with high fats and low carbs. This season is my first time carb cycling for this long and I don't mind it at all. I am still eating a wide variety of food and I don't feel starved.

On March 23, my coach reduced my food intake a little bit to help shed more fat, but I am still carb cycling. Overall, I still feel full and that I am not in too big of a deficit yet. I know it's going to get harder, but I am mentally prepared for it as this will be my 4th time competing but 2nd professional show.

My workout program changed as well! Last month I was doing a lot of lower rep moves and trying to build internal muscle basically to set a strong foundation so when I begin to cut I will have more internal muscle. This month I changed to a drop set workout program. Each workout day focused on a specific body part, for example, Monday was chest/tricep, Tuesday was leg day, etc. Each workout move I did 3-4 sets and I would start off lifting as heavy as I could and each set I would drop one to two plates to a lower weight. All of the moves were on workout machines to make it easier to drop the weight compared to using dumbbells. Overall, I really like the workouts and they are not too long either.

Also, my coach added in HIIT cardio on the treadmill for 45 minutes 4x-5x a week. She said she hated to do this, but my quad muscles are still overpowering in my front pose and I literally need to burn off some of my muscle. The cardio is fasted which means I don't eat before hand. By adding this cardio in that mean my weight lifting workouts got pushed to night so double workouts everyday of the week. The first few days were hard. I am getting used to it, but it is still challenging as I am very tired by the end of the day.

Okay, so lets talk about these refeed meals! OH MY GOSH. It was literally the best meal of every week. My coach gave me one meal a week that I could have any day at any time. I could eat up to 700 calories and the fat/protein/carbohydrate combination did not matter. I just had to keep it under 700 calories. Well, 700 calories sounds like a lot, but once you start food dreaming about everything you want to eat the calories can start to add up really fast...but I made it work to my advantage! I always had it on Saturday and I had one each weekend in the month of March. Here is what I ate (pics below!):

Refeed Meal #1- A stack of vanilla protein pancakes from Wake Up Waffles topped with banana and drizzled with Wild Friends Chocolate Coconut Peanut butter. It.was.pure.bliss! <3

Refeed Meal #2- Babe and I went to dinner at the local diner and I got a three egg omelet stuffed with veggies and wheat toast. Then I came home and made a cookie sundae with a Quest Nutrition Chocolate Chip Peanut Butter Cookie, Halo Top Almond Crunch Ice Cream, and drizzled with Walden Farms International Chocolate Syrup. Again, amazing!

Refeed Meal #3- We went to a BBQ at a friends house and it was SO nice to be able to enjoy the food there rather than having to pack my own food! I felt normal! I had a burger with no bun, no mayo broccoli salad, mac and cheese, veggies, iced tea, Quest Nacho Cheese chips, and one of the homemade brownies I made. It was a true BBQ meal!

Refeed Meal #4- I went classic on my last fun meal. A classic peanut butter and jelly sandwich with homemade plum jam from the Old Town Farmers Market and a banana. For dessert, I made a chocolate mug cake using All American Nutrition Beast Mode cake mix topped with coconut Oikos zero yogurt and Walden Farms Chocolate Sauce. I treasured every bite.

In between all of that change up if you remember in last months post I brought up that I was traveling again this month. I had a work trip to Baton Rouge, LA. Thankfully it was a short two day trip, but you can bet I packed healthy snacks for me to have while traveling or in a pinch! When I went out to dinner I ordered a blackened chicken salad with a side of veggies, hold the cheese and croutons please. I really wanted a million other things on the menu because I mean come on, I was in the south and it was all good cookin down there! But I stayed true to my meal plan and did not deviate once.

In other exciting new I officially registered for my May 4 show!! The OCB Atlantic Supershow in Richmond, VA! Also, I scheduled my tanning appointments and hair and make up! AHHHHH it is so exciting knowing that each day it gets closer and closer!  Right now I need to stay focus on those consistent tasks each day that will get me closer to my goal.

Next month (April) I know there will be a lot of changes because I will be 4 weeks out from my show and it is all about dialing in the nutrition and workouts.


Stay tuned for my April update!


SHARE:

Sunday, March 10, 2019

Coconut-Orange Muffins


New years are often characterized by new beginnings, fresh starts, and leaving the heaviness of last year behind. Well these muffins are no different! The light texture and freshness of freshly grated oranges combined with the tropical taste of coconut will have you leaving the soggy, heavy winter behind and sprinting towards spring time.

I think Food Network did a fantastic job pairing muffin flavors with the season or holiday that surrounded the month it debuts in, but this one eludes me. The original recipe is Pomegranate-Orange Muffins, but I am personally not a fan of eating pomegranate seeds and I love shredded coconut so I made a last minute switch up, which in baking is totally acceptable. Either way neither recipe screams the month of January to me. I would think it would be a muffin speckled with edible glitter with a bold flavor combo that screams New Year! However, maybe they had the same idea that I had. Start off 2018 with a refreshing muffin and cleanse the palate after all the food consumed over the holidays.

Baking is a science, whereas with cooking you have a little more room for freedom, but too much of baking powder or accidently switching sugar with salt can be detrimental to your recipe. So when I made the decision to swap pomegranate seeds for unsweetened shredded coconut I hoped it wouldn’t be a death sentence to my muffins, after all this was the first recipe of the year!

It ended up being a fantastic swap! The unsweetened coconut paired so well with the fresh clementine’s that it made me wish spring was less than 4 months away. Also, now this is a baking preference, but I prefer to bake with unsweetened shredded coconut flakes compared to sweeten unless the recipe specifically calls for sweetened, but even then I am selective. Baked treats are usually pretty sweet to begin with and adding extra sweetened ingredients can overwhelm the baked treat, in my opinion. I am all about indulging my sweet tooth, but I don’t want to feel like I am eating a bar of sugar either. Again, personal preference!

Another change up moment I had with this recipe was that it tells you to put the ENTIRE clementine in the blender, yes, including the peel. I was like “what?!” I even debated back and forth with my fiancĂ© if I should follow the recipe or if I should take the peel off. In the end I decided Food Network knew what they were doing and wouldn’t steer me wrong.

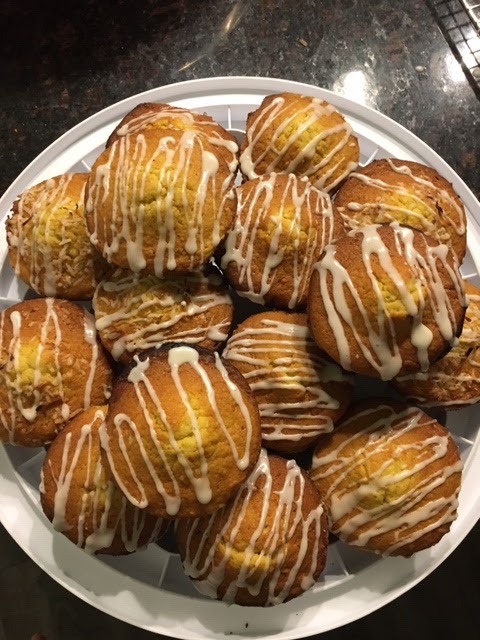
Both my ingredient switch up and going again my hesitation worked out perfectly! The muffins were a huge hit and tasted light, refreshing, and the perfect combo of citrusy to sweet.

Let’s get baking!

What You’ll Need:
•             3 cups all-purpose flour
•             1.5 cups granulated sugar
•             1.5 teaspoon baking soda
•             1 teaspoon aluminum-free baking powder*
•             .5 teaspoon salt
•             3 clementine’s
•             1 cup whole milk, at room temperature**
•             2 large eggs
•             1 cup unsweetened shredded coconut flakes
•             2 sticks unsalted butter, melted and cooled slightly
•             .5 cup pomegranate seeds*
•             .5 cup confectioners’ sugar

*These ingredients are only needed if you make the original recipe of the Pomegranate-Orange Muffins; if not then omit these 2 ingredients. You use aluminum-free baking powder because regular aluminum baking powder can react with the pomegranates and turn your batter blue!
**I used unsweetened almond milk and they turned out fine!

Let’s Get Baking:
1.            Preheat oven to 400 degrees. Line 18 muffin cups with paper liners. Whisk the flour, granulated sugar, baking soda, and salt in a large bowl. Make a well in the center (See picture). *If making recipe with pomegranate seeds, add the aluminum baking powder.
2.            Wash 2 clementine’s and cut them into 8 pieces each (peel and all!) and transfer into a blender. Add the milk, blend until smooth. Add the 2 eggs and blend until combined. Pour the mixture from the blender into the well in the flour mixture. Add the butter, ¾ cup coconut flakes, and stir until just combined. The batter may be a little lumpy.
3.            Divide the batter among the muffin cups until they’re almost filled to the top. The original recipe says to fill the cups ¾ full, but I like a big muffin top on a muffin so I fill them all the way to the top! Sprinkle the remaining ¼ cup shredded coconut evenly among the muffins. If using pomegranate seeds instead top the muffins evenly with the pomegranate seeds.
4.            Bake muffins until they are golden brown and a toothpick inserted in the center comes out clean, about 20 minutes. Those last 5 minutes keep an eye on the muffins to make sure the muffin top edges don’t burn. Allow muffins to cool in the pans for 5 minutes before transferring to a rack to cool completely.
5.            Put the confectioners’ sugar in a small bowl and squeeze the juice from half a clementine into the bowl. Stir to make a thick glaze, adding juice from the other half of the clementine as needed. After the muffins have cooled all the way drizzle the glaze over the muffins and let set for 10 minutes. If you put the glaze while the muffins are still warm they will absorb the glaze or it will melt off, same if you make the glaze too runny the muffin will absorb it. Make it the thickness of the glaze you’d get to put on top of a toaster strudel from when you were a kid.

Enjoy for breakfast, with an afternoon cup of coffee or tea, with colleagues, family, or all to yourself!


If you have any questions, please leave a comment! :) Happy Baking!


SHARE:
© Ashley Blair. All rights reserved.
BLOGGER TEMPLATE MADE BY pipdig